5. Deployment to Kubernetes on DigitalOcean
It's time to bring your DAG to the cloud! You will install packages that contain providers necessary for this deployment, and then you will build and apply deployment just like you did with local deployment.
But before that, you have to take care of a few things. The list includes:
- You need a DigitalOcean account.
- You need to obtain a DigitalOcean Personal Access Token with read and write scopes.
Regardless of whether you have a DigitalOcean account, we strongly recommend you create a new DigitalOcean account for this guide because:
- We want to avoid anything happening to your production DigitalOcean account.
- DigitalOcean supports only one Container Registry per account, and the
torque.container_registry.V1Providersupports only the creation of a new registry. Re-using the existing registry is currently not supported.
To open a new DigitalOcean account, you can use our referral link and get $200 worth of credits:
Use Torque's Referral
(You can learn more about DigitalOcean's referral program at DigitalOcean Referral Program.)
⚠️ Important: How much will this cost me?
When you sign up for DigitalOcean, it will ask you for your credit card as a part of the account verification. If you use our referral link and get $200 worth of credits, your credit card won't be charged for following this "Getting Started" guide.
On the other hand, here is an estimate of how much does it cost to deploy the DAG from this guide to DigitalOcean and to keep it up and running for a whole month:
=========================================  ==========
Service                                    Cost
=========================================  ==========
Container Registry (Starter)               $0/mo
Kubernetes (1 Basic Node)                  $12/mo
Load Balancer (starts from)                $12/mo
Managed Database (PostgreSQL Basic)        $15/mo
**Total if kept running for 1 month.**     **$39/mo**
=========================================  ==========
It takes only one command to take all DigitalOcean provisioned resources down. The Deleting the Deployment section introduces you to the way to strip the resources down with one command. You do not need to worry about dangling resources on DigitalOcean after finishing this tutorial.
Estimates were calculated from DigitalOcean's pricing page: www.digitalocean.com/pricing
Next, you'll need your DigitalOcean Personal Access Token with the read and write scopes. With your Personal Access Token, the DigitalOcean provider can deploy your DAG to DigitalOcean. Please follow the official guide: docs.digitalocean.com/reference/api/create-personal-access-token/
Now that you have a DigitalOcean Personal Access Token, you can use it for the DO_TOKEN environment variable used by the Torque CLI.
Installing packages
Let's install K8s and DigitalOcean packages that will enable the deployment.
torque package install git+https://github.com/torquetech/torque-do-provider.git && \
torque package install git+https://github.com/torquetech/torque-do-domains-provider.git && \
torque package install git+https://github.com/torquetech/torque-do-certificates-provider.git && \
torque package install git+https://github.com/torquetech/torque-do-managed-k8s-provider.git && \
torque package install git+https://github.com/torquetech/torque-do-managed-postgres-provider.git && \
torque package install git+https://github.com/torquetech/torque-do-managed-container-registry-provider.git && \
torque package install git+https://github.com/torquetech/torque-container-registry-provider.git && \
torque package install git+https://github.com/torquetech/torque-k8s-provider.git && \
torque package install git+https://github.com/torquetech/torque-k8s-volumes.git && \
torque package install git+https://github.com/torquetech/torque-k8s-do-volumes-provider.git && \
torque package install git+https://github.com/torquetech/torque-k8s-do-nginx-hlb-provider.git && \
torque package install git+https://github.com/torquetech/torque-k8s-load-balancer-provider.git && \
torque package install git+https://github.com/torquetech/torque-k8s-basics-provider.git
Creating deployment
The deployment will use a combination of multiple providers related to DigitalOcean and Kubernetes. This trivial change makes all the difference. With just one parameter change, you will deploy your system on DigitalOcean using Kubernete instead of Docker Compose.
torque deployment create prod \
  --provider=torque.do.V1Provider \
  --provider=torque.do_certificates.V1Provider \
  --provider=torque.do_managed_k8s.V1Provider \
  --provider=torque.do_managed_postgres.V1Provider \
  --provider=torque.do_managed_container_registry.V1Provider \
  --provider=torque.container_registry.V1Provider \
  --provider=torque.k8s.V1Provider \
  --provider=torque.k8s_do_volumes.V1Provider \
  --provider=torque.k8s_load_balancer.V1Provider \
  --provider=torque.k8s_do_nginx_hlb.V1Provider \
  --provider=torque.k8s_basics.V1Provider \
  --extra-config do.yaml
Notice that we referred to an additional configuration file do.yaml, and this file should be in your root directory. You can create do.yaml file:
touch do.yaml
And add the following content into it:
providers:
  torque.k8s.V1Provider:
    configuration:
      quiet: false
      overrides: {}
  torque.do.V1Provider:
    configuration:
      region: nyc3
      quiet: false
      overrides: {}
  torque.do_managed_container_registry.V1Provider:
    configuration:
      subscription_tier_slug: basic
dag:
  components:
    lb:
      bonds:
        impl-cert:
          implementation: torque.do_certificates.V1External
          configuration:
            domain: example.com
            key_file: key.pem
            certificate_file: cert.pem
Or you can download it from do.yaml.
curl -L https://github.com/torquetech/docs-examples/releases/download/docs/do_v2.yaml > do.yaml
And for the SSL to work properly you need to add a couple of pem files mentioned in the configuration. You can download them from key.pem and cert.pem.
curl -L https://github.com/torquetech/docs-examples/releases/download/docs/key.pem > key.pem && \
curl -L https://github.com/torquetech/docs-examples/releases/download/docs/cert.pem > cert.pem
As mentioned, a new chapter on configurations and customizations is coming soon.
Deploying to DigitalOcean
Once you have your DigitalOcean Personal Access Token, use this command to set DO_TOKEN environment variable run:
export DO_TOKEN=<dop_v1_replace_with_your_personal_access_token>
After you set DO_TOKEN, we are ready to build and apply prod deployment:
torque deployment build prod
torque deployment apply prod
The apply command will be waiting for all instances to be created on DigitalOcean and it might take up to half an hour until everything is up and running. But you do not need to worry about it, providers will do all the work.
After the apply command finishes, you can visit your DigitalOcean Dashboard to check created K8s cluster. DigitalOcean does a great job of explaining how to set up the kubectl config and use it to observe your K8s cluster.
⚠️ Important:
The same rules for managing infrastructure with Infrastructure as Code solutions apply: do not change anything manually. If you need to change something, do it through torque commands.
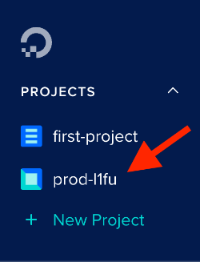
The IP address of your K8s cluster load balancer can be found at the DigitalOcean Dashboard:
Open your
prod-*project from the DigitalOcean Dashboard.
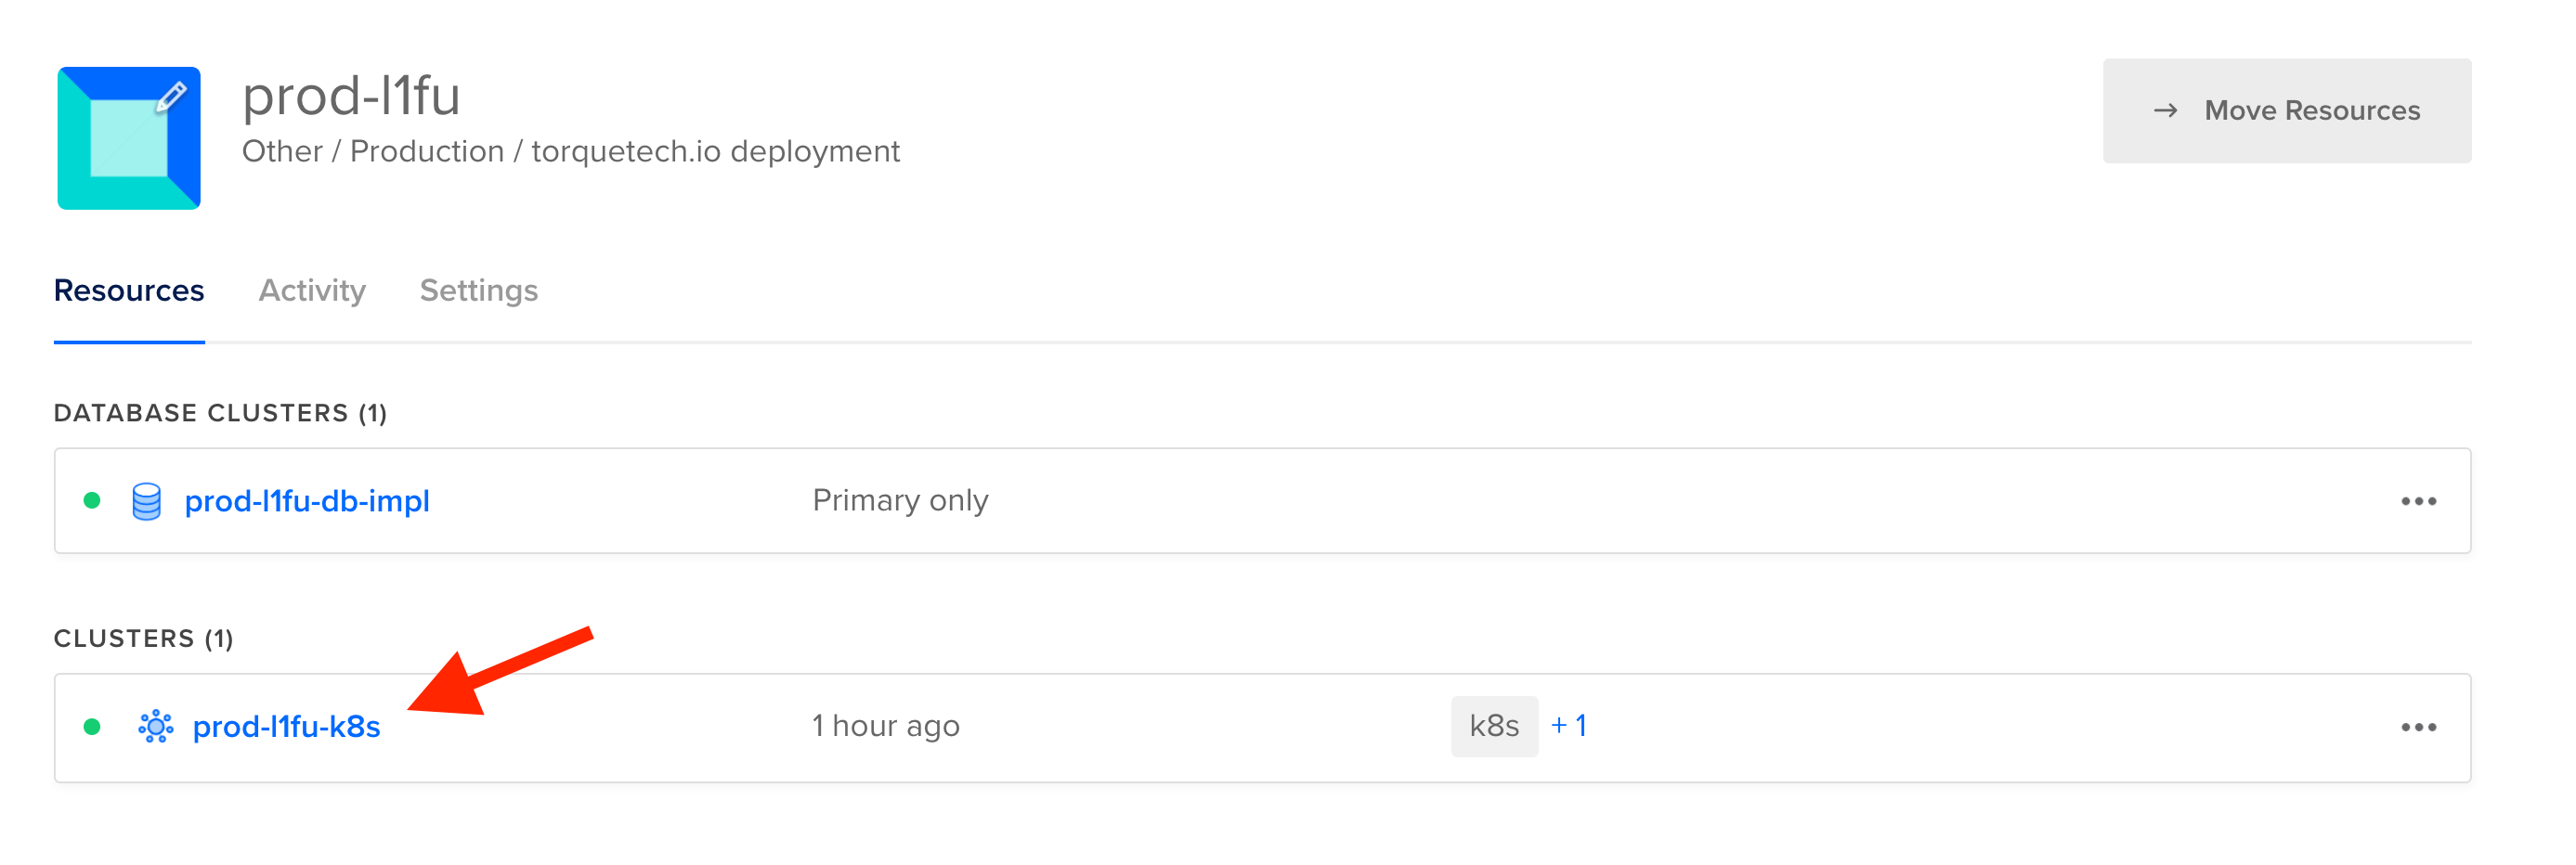
Select the
prod-*-k8scluster.
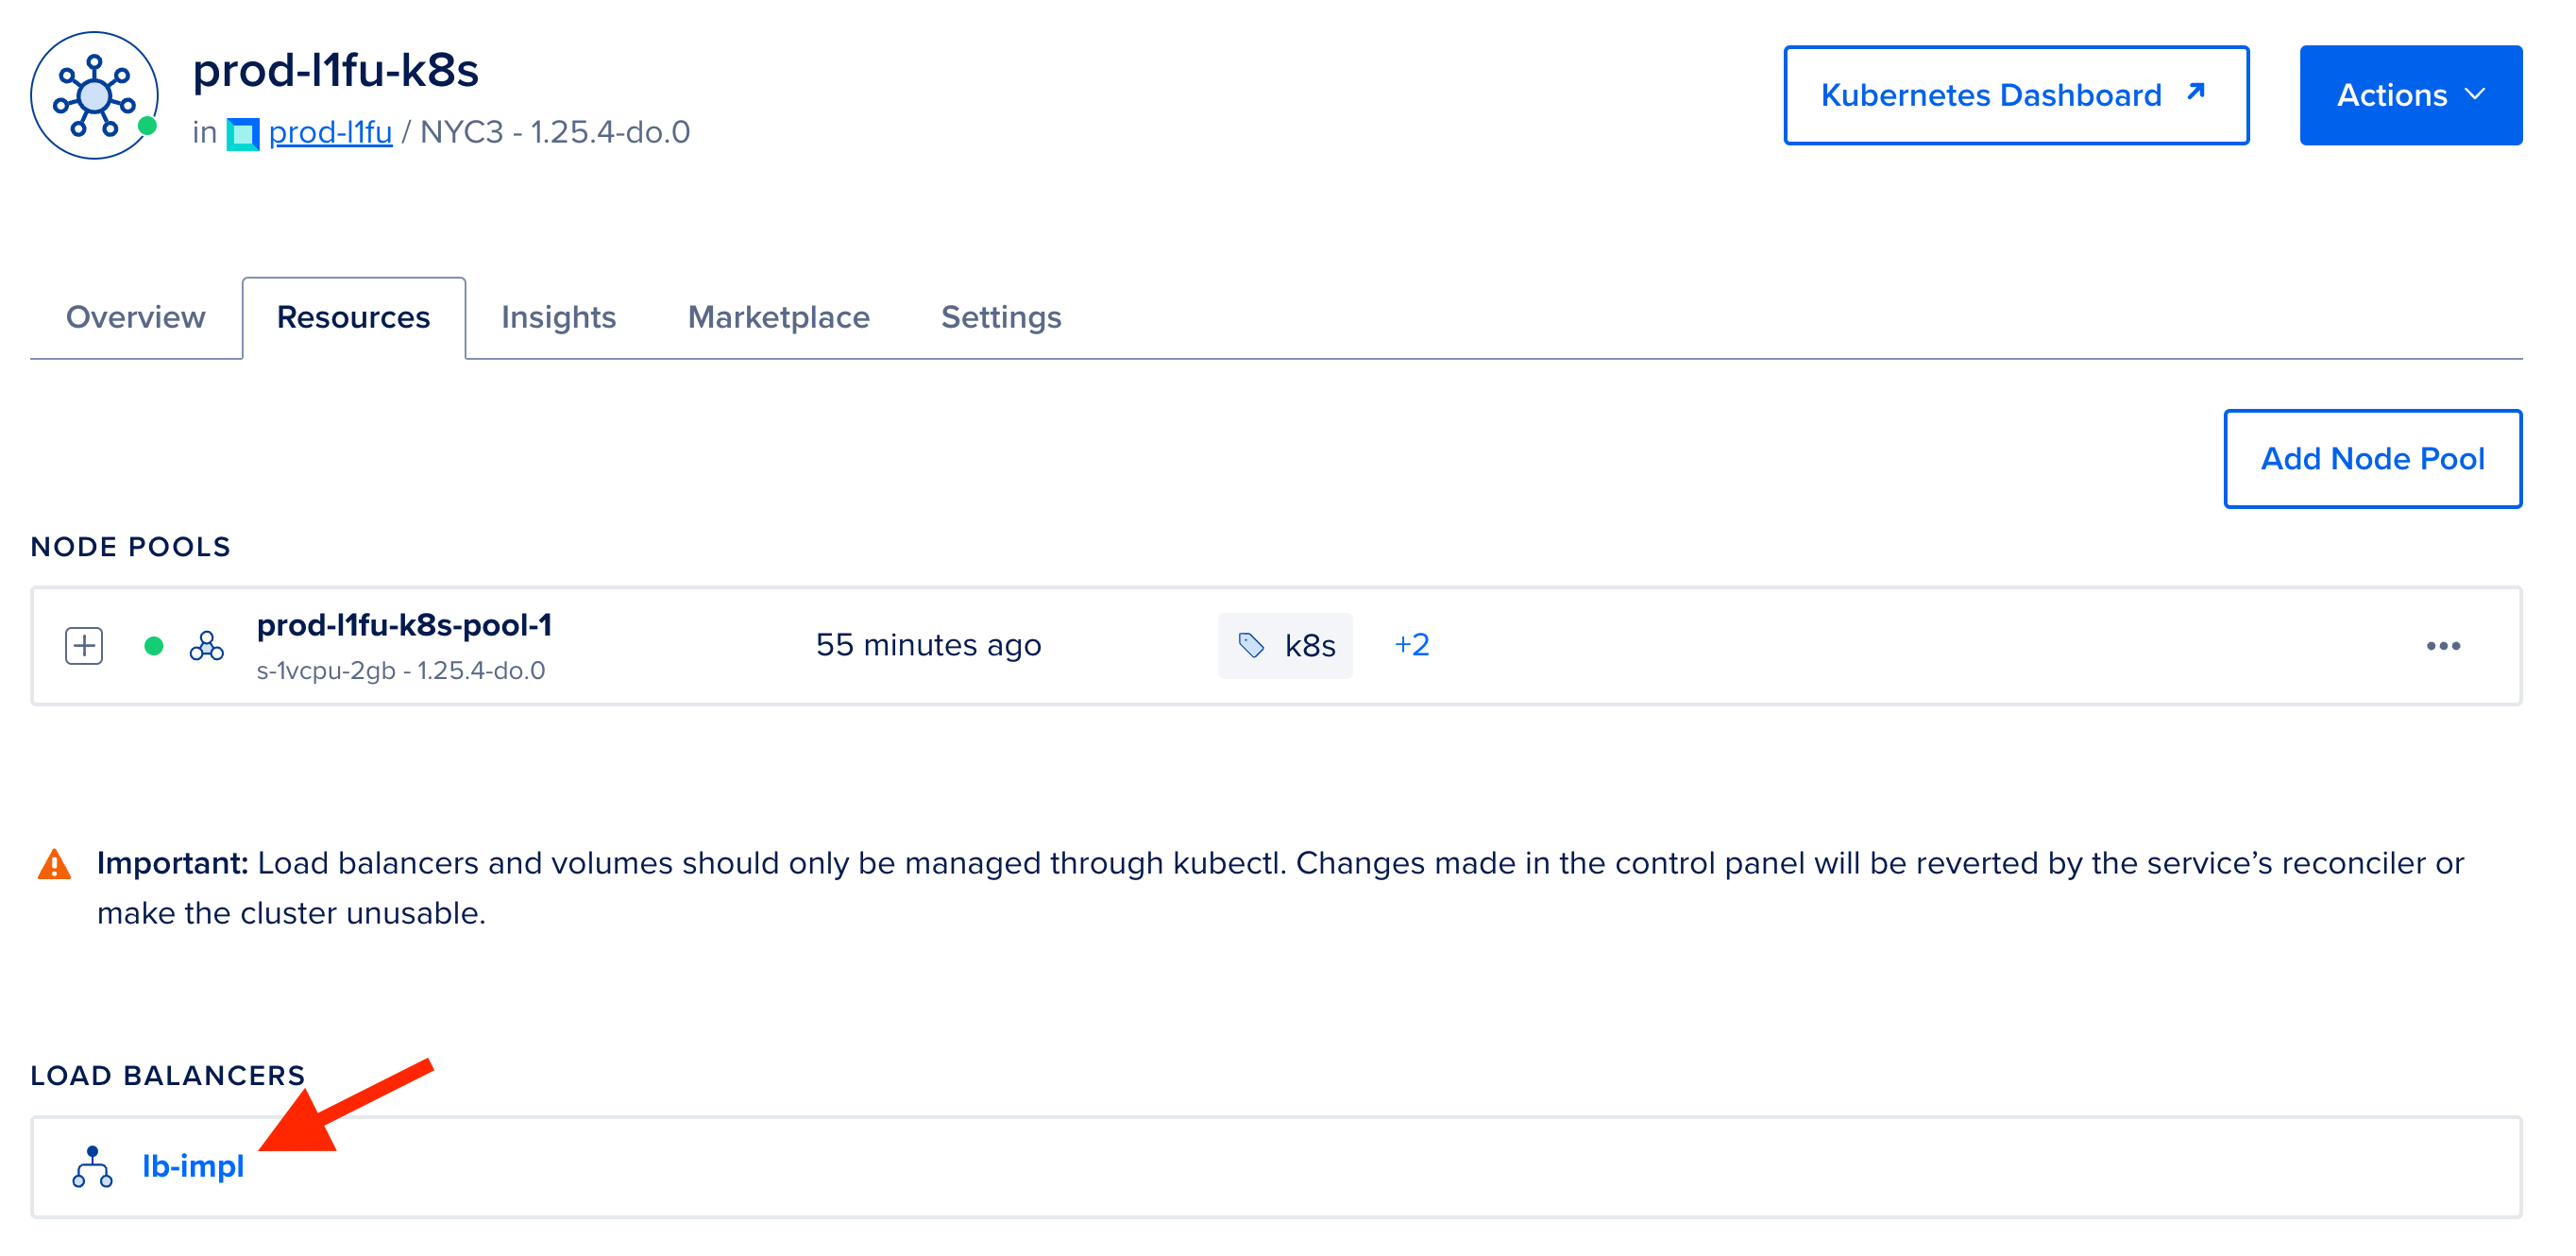
Select the Resources tab.

Select
lb-implbalancer inside the Load Balancers group.
The IP address will be at the end of the navigation breadcrumbs. Click on the IP address to copy it to your clipboard.

Now that you have the IP address, you can run:
curl -H "Host: api.example.com" https://<IP address>/backend-service -k
☝️ Note:
It might take up to a minute for the container to spin up for the first time. So if you get a 503 Service Temporarely Unavailable error from Nginx, wait a bit and try again.
The output should be the current database time.
Database time: 2023-01-09T10:49:30.536818Z%